This post is about Azure Blueprints and Bicep and how both technologies can be used to build fast, standardized environments.
If you are interested in learning more about Project Bicep and the .bicep file format, here are some posts that provide some introductory material:
- Project Bicep, an ARM Domain-Specific Language
- Project Bicep – beyond ARM templates
- GitHub Action for Project Bicep (ARM DSL)
If you are interested in Azure Blueprint – you can find more infos here.
Prerequisites
- Azure Subscription(if you don’t have one, you can get one here for free
- Resource Group(name is not necessary, we will use „rgstorage“ in this article
- VS Code and Bicep Extension
Our Solution should look like this:

Goals
Deployment of a Storage Accounts according to a standardized procedure and automatic deployment to a specific resource group (rg-storage) and the tag „Creator“ attached to the Storage. For simplicity, we use storage accounts for deployment – of course, almost any Azure resource can be deployed in this way.
Why Azure Blueprints?
Blueprints allow us to define a repeatable collection of Azure resources that can be used to implement and enforce an organization’s standards, patterns, and requirements. Many organizations deploy Azure but forget to think about governance issues.
For example, a company uses Azure and gives its employees access to the Azure portal and lets them deploy Azure resources without enforcing tags to give the Azure resources information, metadata and the Answer to Questions such as „who created this resource“, „how long will it be needed“, „who is the technical owner of this resource?“
Worst case here is a huge bill at the end and nobody knows which resource has been created for which purpose and whether it is still needed or not. Blueprints kann help to Gover the Deployment of Resources in Azure.
Create your Bicep Template
First things frist- You need VS Code. Great Editor with great Extensions – Especially the Bicep Extension which we need in our Case for the language Support and autocomplete Feature.
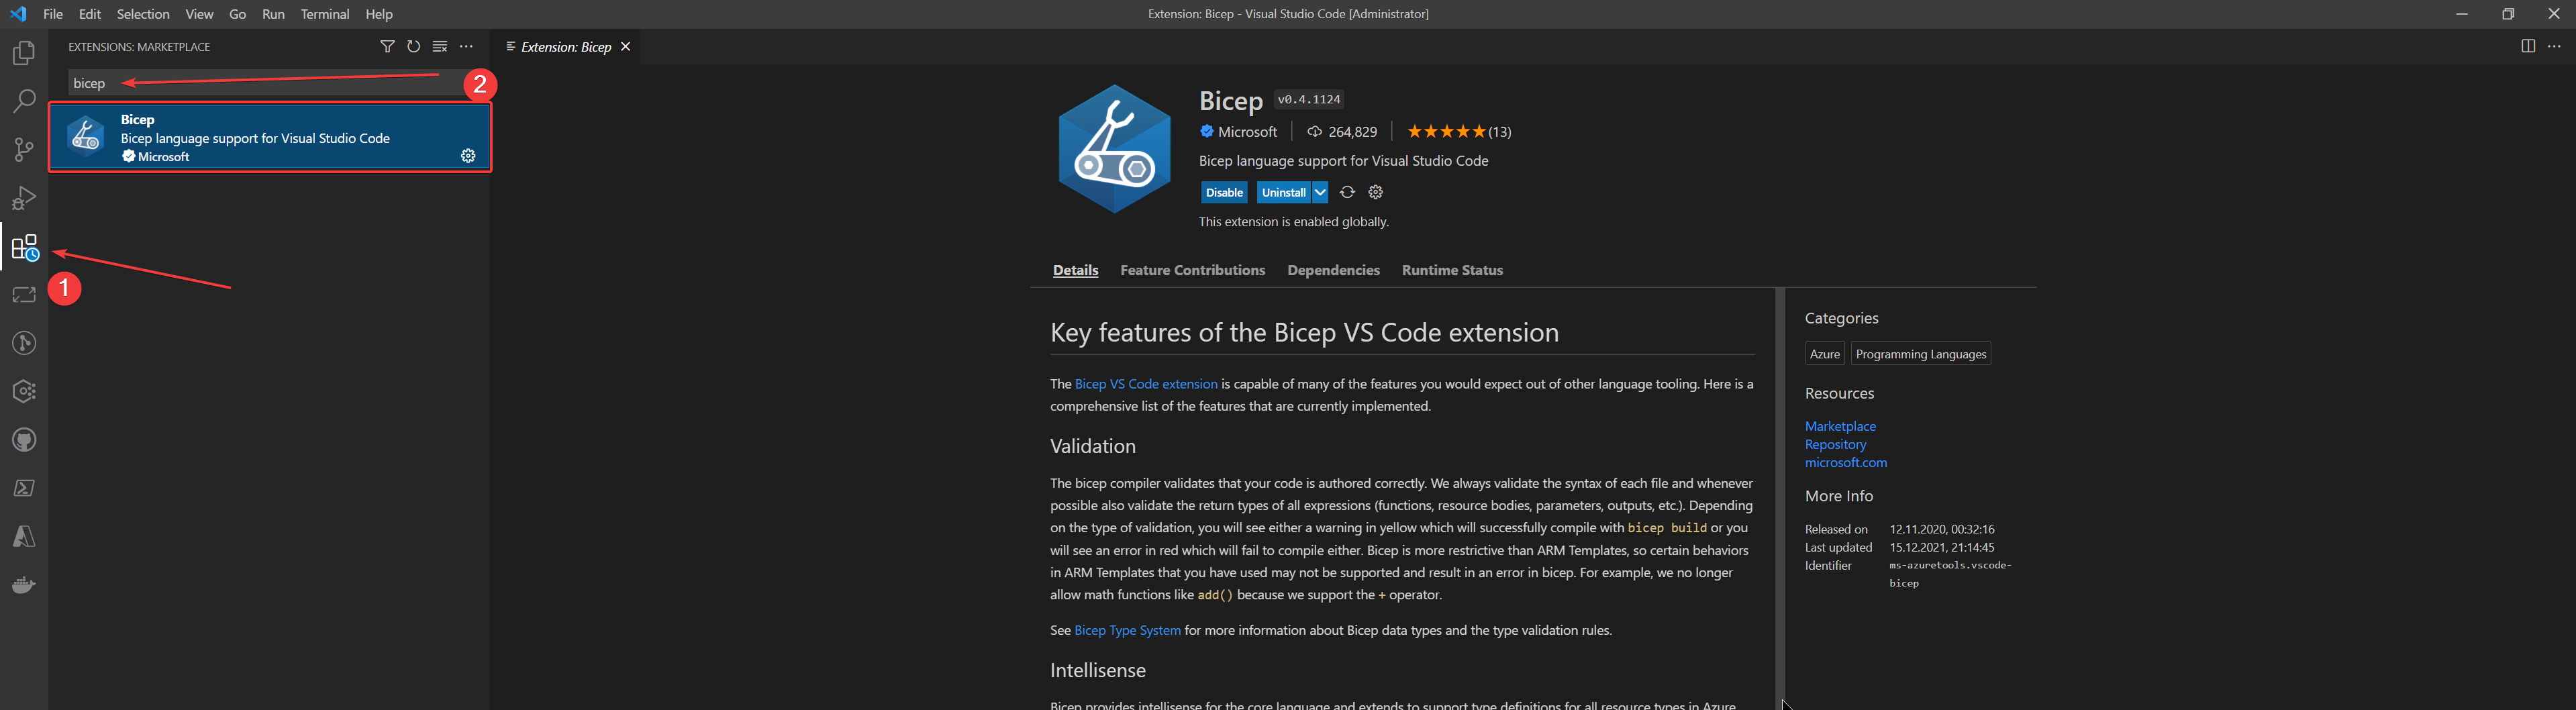
For example, if you define a Storage Account with VS code, the Bicep extension provides IntelliSense which makes it very easy to handle code.
we create a file and name it main.bicep. Our bicep script is compact and looks like this in the end:
var location = 'west europe'
param createdby string

resource storageresource 'Microsoft.Storage/storageAccounts@2021-06-01'= {
  name: 'st${uniqueString(resourceGroup().id)}'
  location: location
  sku: {
    name: 'Standard_LRS'
  }
  properties: {
   accessTier: 'Hot'

  }
  kind: 'BlobStorage'
  tags: {
    'creator': createdby
  }
}
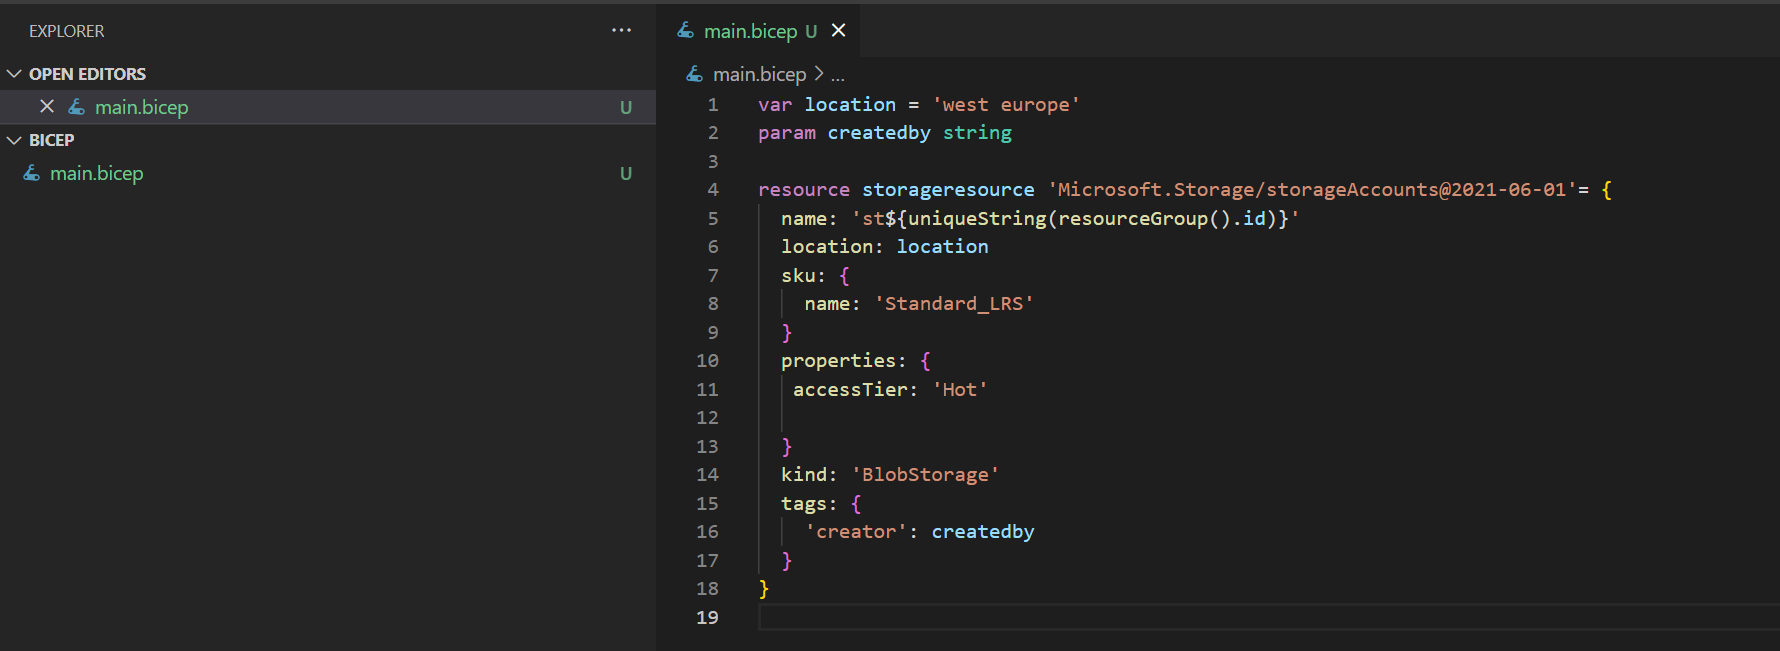
This script creates a blob storage account with a uniquestring in the name because storage accounts have to be unique in the name and adds a tag „Createdby“ to the storage account. This tag can later be used to specify our name in the Blueprint – more on this in a moment.
You can also visualize your bicep file to see what the script will deploy.
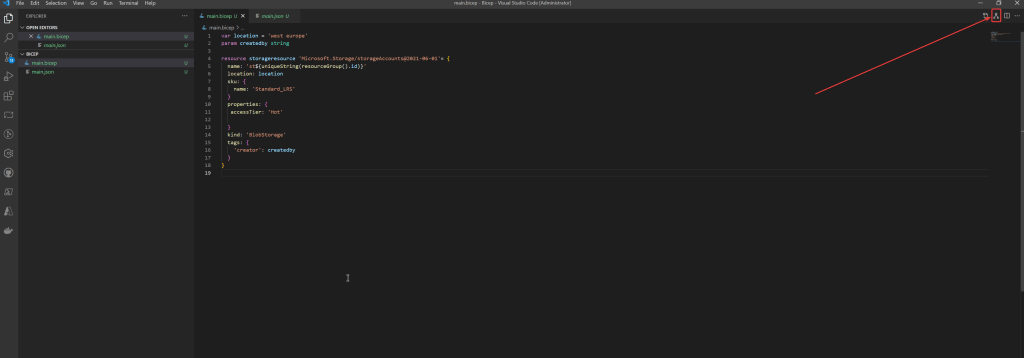

Azure Blueprints only works with ARM – Therefore we have to compile our main.bicep file in ARM. This can be done very easily via VSCode via „Build“ Just right right click at the main.bicep in the explorer.
now, just copy the main.json Code – We will need it in the next step. Main.json should look like this(Looks longer and more complex than bicep, isn’t it?):
{
  "$schema": "https://schema.management.azure.com/schemas/2019-04-01/deploymentTemplate.json#",
  "contentVersion": "1.0.0.0",
  "metadata": {
    "_generator": {
      "name": "bicep",
      "version": "0.4.1124.51302",
      "templateHash": "5061531618729731049"
    }
  },
  "parameters": {
    "createdby": {
      "type": "string"
    }
  },
  "variables": {
    "location": "west europe"
  },
  "resources": [
    {
      "type": "Microsoft.Storage/storageAccounts",
      "apiVersion": "2021-06-01",
      "name": "[format('st{0}', uniqueString(resourceGroup().id))]",
      "location": "[variables('location')]",
      "sku": {
        "name": "Standard_LRS"
      },
      "properties": {
        "accessTier": "Hot"
      },
      "kind": "BlobStorage",
      "tags": {
        "creator": "[parameters('createdby')]"
      }
    }
  ]
}
Deploy Azure Blueprints
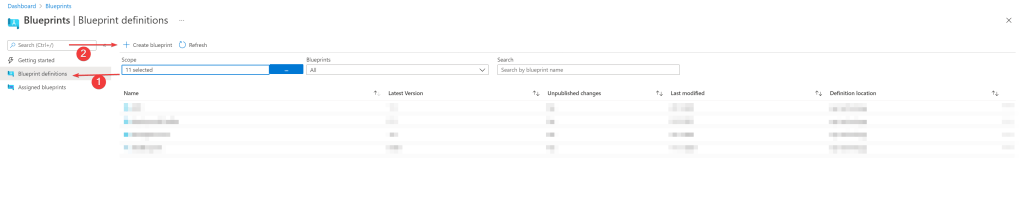
Now, we need to go to the Azure portal and search for Blueprints in the search bar.

Now we can create an Azure Blueprint. In Blueprint Definitions will be the store for our Blueprints. in Assigned Blueprints are the assigned Blueprints – For Example: When John Doe uses the Blueprint he assigns it and we find all the information about his deployment in „assigned Blueprints“.
let’s create our Blueprint. Select Blueprint definitions and then Create Blueprint.
we are starting with a blank blueprint.
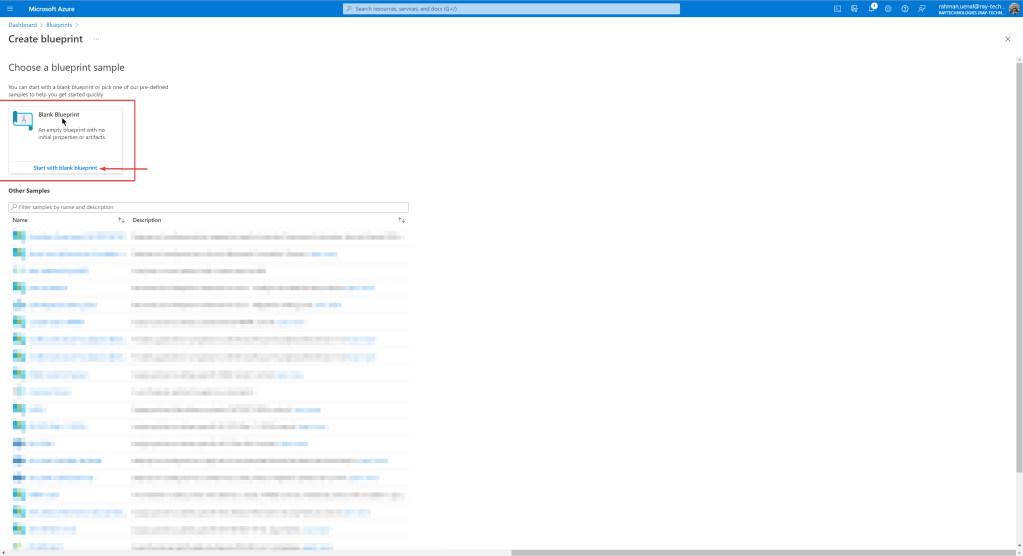
We name our Blueprint „DeployStorageAccount“ You can name it whatever you want. You can set a scope for your Blueprint under „Definition Location“. You only want the Blueprint to be usable in a certain management group or subscription? Then you can set it also here in the section.

I have set as scope my subscription „Sub-management“. now we come to the interesting part.
First Artifact in our Azure Blueprint
Via „Next: Artifacts“ we can configure our artifacts (ARM code etc.). First we create an artifact in which we describe that the storage account should be deployed to the resource group „rgstorage“.
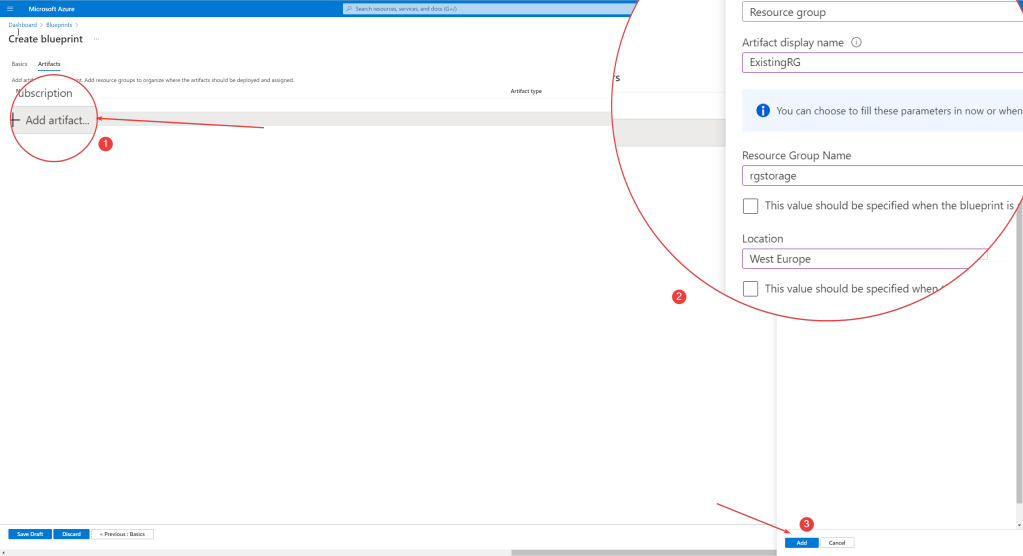
After that we have created our first Artifact to define the Resource Group where to deploy our main.json.
Nexst Step is to add another Artifact where we paste our main.json code, like mentioned before for the Storage Account Deployment.

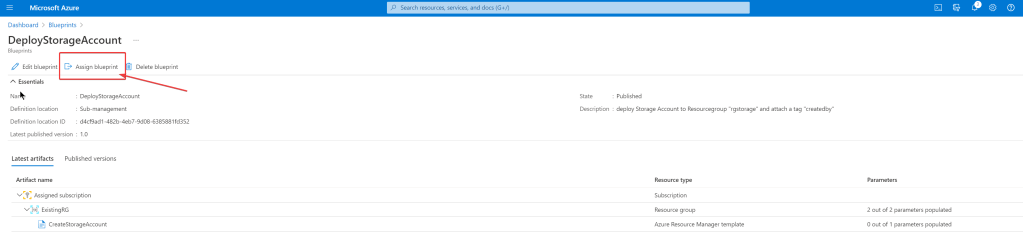
After adding the second Artifact the Blueprint overview should look like this:

Now it’s time to Save Draft and save our Blueprint Definition.
Publish Blueprint Definition
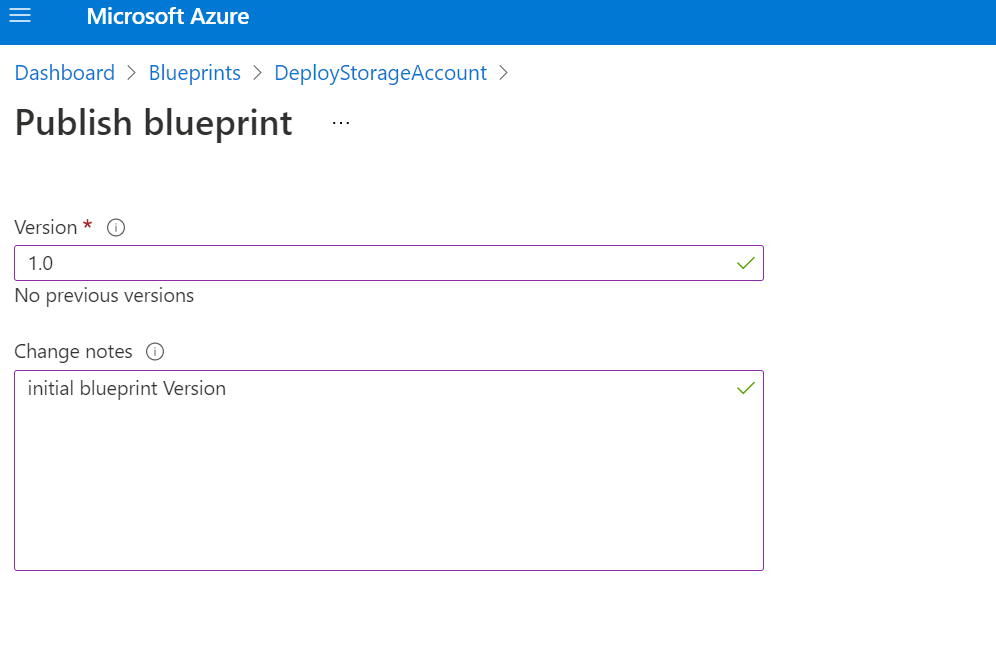
now we can publish our definition and provide it with a version. This has the advantage that we can edit the blueprint and have a traceability and history of the blueprint in case of changes.

Select „DeploystorageAccount“ – If you can’t see the blueprint, make sure you have chosen the right Scope. Next Step is to „publish blueprint“

Now we just need to add a version and then you can publish the Blueprint.
After Publishing it’s now possible to „Assign blueprint“
| Assignment name | Each Assignment(Deployment) need a name |
| Location | This is the Location for the managed identity which is needed for the Deployment |
| Blueprint Definition Version | This is the Version of our Definition –> 1.0 |
| createdby | This is the parameter where we enter the name of the creator so that it is later attached to the storage account as a tag. |

Finally, we just need to check if the assignment is correct

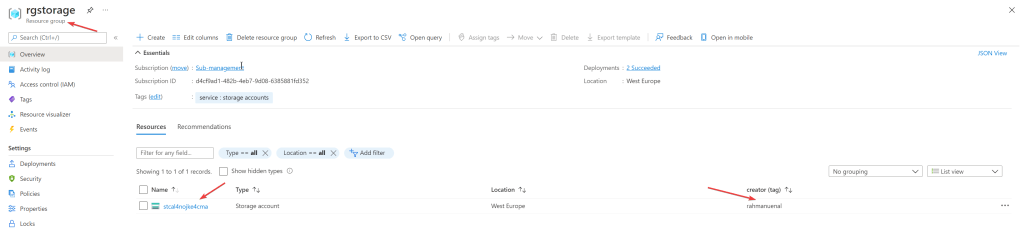
Let’s go the the Resourcegroup „rgstorage“ to check if the storage Account is deployed:
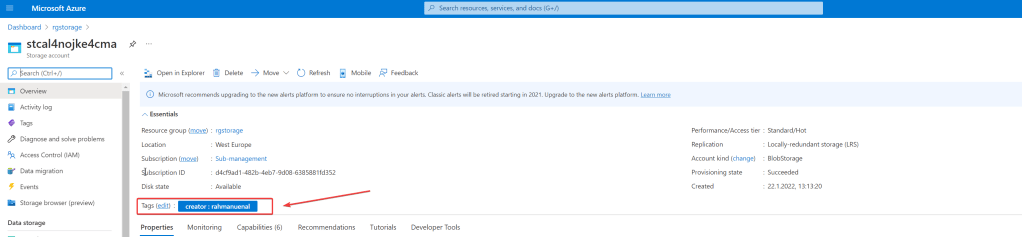
let’s also check the Storage Account for the required Tag „Creator“:
Looks very good! i hope this article helps to get a basic understanding about Azure Blueprints and how they work.

Hinterlasse einen Kommentar